What is Teeth Whitening Photo Editing?
Teeth whitening photo editing is the process of digitally enhancing the appearance of teeth in a photograph to make them appear whiter and brighter. This is typically done using photo editing software and involves a series of adjustments to color, brightness, and contrast. It’s a common technique used in portrait photography, especially for enhancing smiles and improving overall image quality. The goal is to achieve a natural-looking result that complements the subject’s features without appearing artificial or overdone. This method allows you to have a perfect smile even without expensive dental procedures.
Why Use Free Photo Editing for Teeth Whitening?
Utilizing free photo editing software for teeth whitening offers numerous advantages. Primarily, it’s cost-effective, making professional-looking enhancements accessible to everyone. Furthermore, free software often provides a user-friendly interface, making it easier for beginners to achieve desirable results without a steep learning curve. It’s also convenient; you can edit photos anytime, anywhere, without the need for appointments or costly services. The ability to experiment and undo changes allows for a creative approach to editing, giving you control over the final outcome. With the right tools and a little practice, you can significantly improve the appearance of your teeth in photos and boost your confidence without spending a dime. This is perfect solution for enhancing your photos without expensive dental procedures.
Choosing the Right Photo Editing Software

Selecting the right photo editing software is crucial for effective teeth whitening. Several free options offer robust features suitable for this task. Consider software like GIMP, known for its advanced editing capabilities and extensive plugin support, making it ideal for complex adjustments. Another great option is Photopea, a browser-based editor that mimics the functionality of Adobe Photoshop, offering a familiar interface and powerful tools. Furthermore, consider looking at applications like Canva, which offers user-friendly interface, suitable for beginners. When choosing, assess the availability of tools like selection brushes, color correction, and sharpening filters. User reviews, tutorials, and community support can also guide your decision, ensuring you select software that meets your specific needs and skill level.
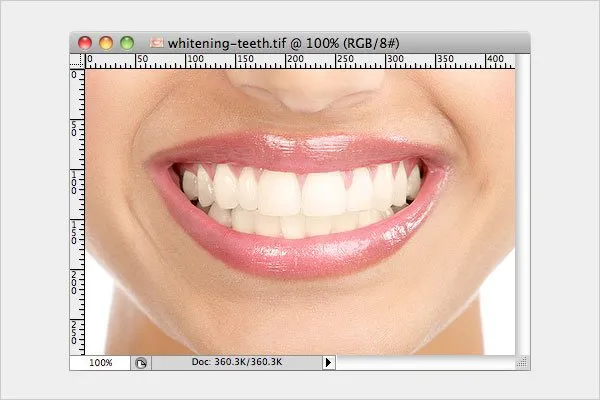
Step 1 Open and Prepare Your Image
The initial step in teeth whitening photo editing is to open your image in the chosen software. Once the image is loaded, it’s essential to assess its overall quality. This includes checking for any imperfections or areas that might affect the editing process. Consider making preliminary adjustments to the image, such as cropping to remove unwanted elements and improve composition. Next, evaluate the lighting and color balance; if the image appears too dark or the colors are off, make corrections to brightness and contrast to ensure a balanced starting point. Preparing your image properly sets the foundation for successful teeth whitening and contributes significantly to achieving a natural-looking result. Ensure that you save your original image before making any major changes.
Step 2 Isolate the Teeth
Isolating the teeth is a critical step in the teeth whitening process, ensuring that adjustments are applied precisely. This is usually achieved using tools like the lasso tool, the magic wand, or the quick selection tool, depending on the software. Carefully trace around the teeth, creating a precise selection. The selection should be as close to the edges of the teeth as possible to avoid affecting the surrounding gums and skin. If the selection is imperfect, use the refine edge tool to smooth out any rough areas. Accurate isolation prevents unintended color changes to other parts of the image. By focusing solely on the teeth, you can apply adjustments with greater control and achieve a more natural look, making the process efficient and effective.
Step 3 Adjust Brightness and Contrast

Once the teeth are isolated, the next step involves adjusting the brightness and contrast. These adjustments can significantly enhance the appearance of the teeth. Begin by slightly increasing the brightness to make the teeth appear whiter. However, it is essential to be cautious, as over-brightening can result in an artificial look. Next, fine-tune the contrast; a slight increase can help define the shape and texture of the teeth, making them appear more vivid. Regularly compare your edited image to the original to gauge the changes and prevent overdoing the adjustments. The aim is to achieve a balance that enhances the teeth’s brightness and clarity without compromising their natural appearance. Minor adjustments often yield the best results, ensuring a subtle, yet effective enhancement.
Step 4 Whiten the Teeth
Whitening the teeth directly involves adjusting their color to reduce any yellowing or discoloration. Use the color correction tools in your software, like the hue/saturation or color balance options. Start by slightly decreasing the yellow tones and increasing the white tones. A subtle shift is generally best to avoid an unnatural, overly white appearance. Some software offers specific tools designed for teeth whitening, which can simplify this process. Experiment with different settings to achieve the desired level of whiteness, but always aim for a natural-looking result that complements the overall image. Check your work periodically to avoid making the teeth look too bright compared to the rest of the image.
Step 5 Refine and Soften the Edges
Refining and softening the edges after whitening is crucial for achieving a natural look. Hard edges can make the edited teeth appear artificial. Use the software’s smoothing or feathering tools to soften the transition between the teeth and the surrounding gums. Adjust the feathering radius to blend the edges seamlessly. Additionally, carefully check for any imperfections, such as uneven color or remaining discoloration, and correct them using the brush or healing tools. This involves blending the adjustments to match the natural contours of the teeth and the overall image. Paying close attention to these details ensures that the final result looks polished and realistic. It also means the teeth do not stand out from the image.
Step 6 Final Touches and Saving

After completing the whitening process, apply final touches to ensure a polished result. This might include slightly adjusting the overall color balance of the image to ensure the teeth blend seamlessly. Check for any remaining artifacts or imperfections and correct them using the healing brush or clone stamp tools. Then, make final adjustments and be sure to save your edited image in a suitable format. Consider using a high-quality format like JPEG for online sharing or printing, and remember to save a copy of the original image before making your final edits. Reviewing the image at full size is essential to ensure that your edits look natural and aesthetically pleasing. This final step guarantees that your photo is perfect.
Common Mistakes and How to Avoid Them
Several common mistakes can hinder achieving a natural-looking result. Over-whitening is one of the most frequent issues; to avoid this, gradually whiten the teeth and regularly compare your progress to the original image. Another mistake is neglecting to refine edges, which results in a harsh appearance. To avoid this, use feathering tools to blend edges. Furthermore, not considering the overall lighting and color balance of the image can make the teeth appear unnatural. Adjust the brightness, contrast, and color balance to integrate the edited teeth seamlessly into the photograph. Carefully reviewing the image at each step, along with practicing regularly, will help you to avoid these common errors and refine your editing skills.
Enhancing Your Smile Beyond Whitening
While teeth whitening is a primary focus, enhancing your smile can encompass other aspects of photo editing. Consider subtle adjustments to the gums, using healing tools to remove blemishes or discoloration. You can also gently reshape the teeth or adjust their alignment to create a more symmetrical appearance. Be cautious when making these changes, as overdoing them can lead to an artificial look. Focusing on overall enhancements, such as improving skin tone and reducing shadows, can also contribute to a more radiant smile. The objective is to complement your natural features and achieve a result that boosts confidence. Experiment with different techniques, always keeping a natural aesthetic in mind.