Understanding Teeth Whitening for Photos
In the world of photography, a radiant smile can transform a good photo into a great one. Teeth whitening for photos isn’t just about aesthetics; it’s about enhancing the overall impact and appeal of an image. Whether you’re a professional photographer or a casual snapper, understanding how to brighten teeth in your pictures can significantly elevate your work. This guide delves into the top 5 secrets to achieving that perfect, camera-ready smile. The goal is to help you capture images that truly shine, using a combination of in-the-moment techniques and post-processing strategies.
The Importance of Teeth Whitening in Photography
Bright, white teeth are often associated with health, youth, and attractiveness. In photography, they act as a focal point, drawing the viewer’s eye and enhancing the overall composition of the image. A smile with white teeth can instantly make a portrait more engaging and welcoming. Conversely, discolored teeth can detract from an otherwise perfect photo, making the subject appear less vibrant and potentially affecting the emotional response the image elicits. Mastering teeth whitening for photos is therefore a critical skill for anyone aiming to create compelling and visually appealing photographs.
How Bright Teeth Enhance Photos

Bright teeth contribute to the overall aesthetic balance of a photograph. They provide contrast, making the subject’s face appear more defined and the smile more expressive. In group photos, bright smiles create a sense of unity and happiness. Think about it a photo with dazzling teeth immediately grabs attention. This is because bright teeth reflect light, creating a natural highlight that guides the viewer’s gaze. By whitening teeth, you enhance the image, making it more visually appealing, memorable, and impactful. This small change can make a significant difference in how your photos are perceived, ultimately boosting the success of your images.
Secret 1 Proper Lighting Techniques
Lighting is the cornerstone of photography, and it plays a crucial role in how teeth appear in your photos. The right lighting can make teeth look naturally brighter, while the wrong lighting can accentuate any discoloration. The secret lies in understanding and utilizing different light sources effectively. By mastering lighting, you can significantly enhance the appearance of your subject’s teeth without even touching post-processing tools, ensuring that you start with the best possible image.
The Impact of Natural Light
Natural light, especially during the golden hours (shortly after sunrise and before sunset), can create a soft, flattering glow that enhances the appearance of teeth. Avoid harsh sunlight, which can cast strong shadows and accentuate imperfections. Instead, position your subject so the light is diffused, perhaps by using a shaded area or a reflector to bounce light back onto their face. Diffused natural light provides a balanced illumination that minimizes shadows and ensures a more even skin tone. This is an excellent starting point for making teeth appear naturally brighter without the need for extensive editing.
Using Artificial Light Effectively

When natural light isn’t available, artificial light sources like studio lights, speedlights, or even well-placed lamps can be used. The key is to soften the light to avoid harsh shadows. Use a diffuser or softbox to spread the light evenly across the subject’s face. Experiment with different angles and intensities to find what works best. For example, a light positioned slightly above and in front of the subject can create a pleasing highlight on the teeth. Careful manipulation of artificial light gives you complete control over the image’s appearance, allowing you to create the desired effect regardless of environmental conditions. This control is invaluable in ensuring consistently bright and attractive teeth in your photos.
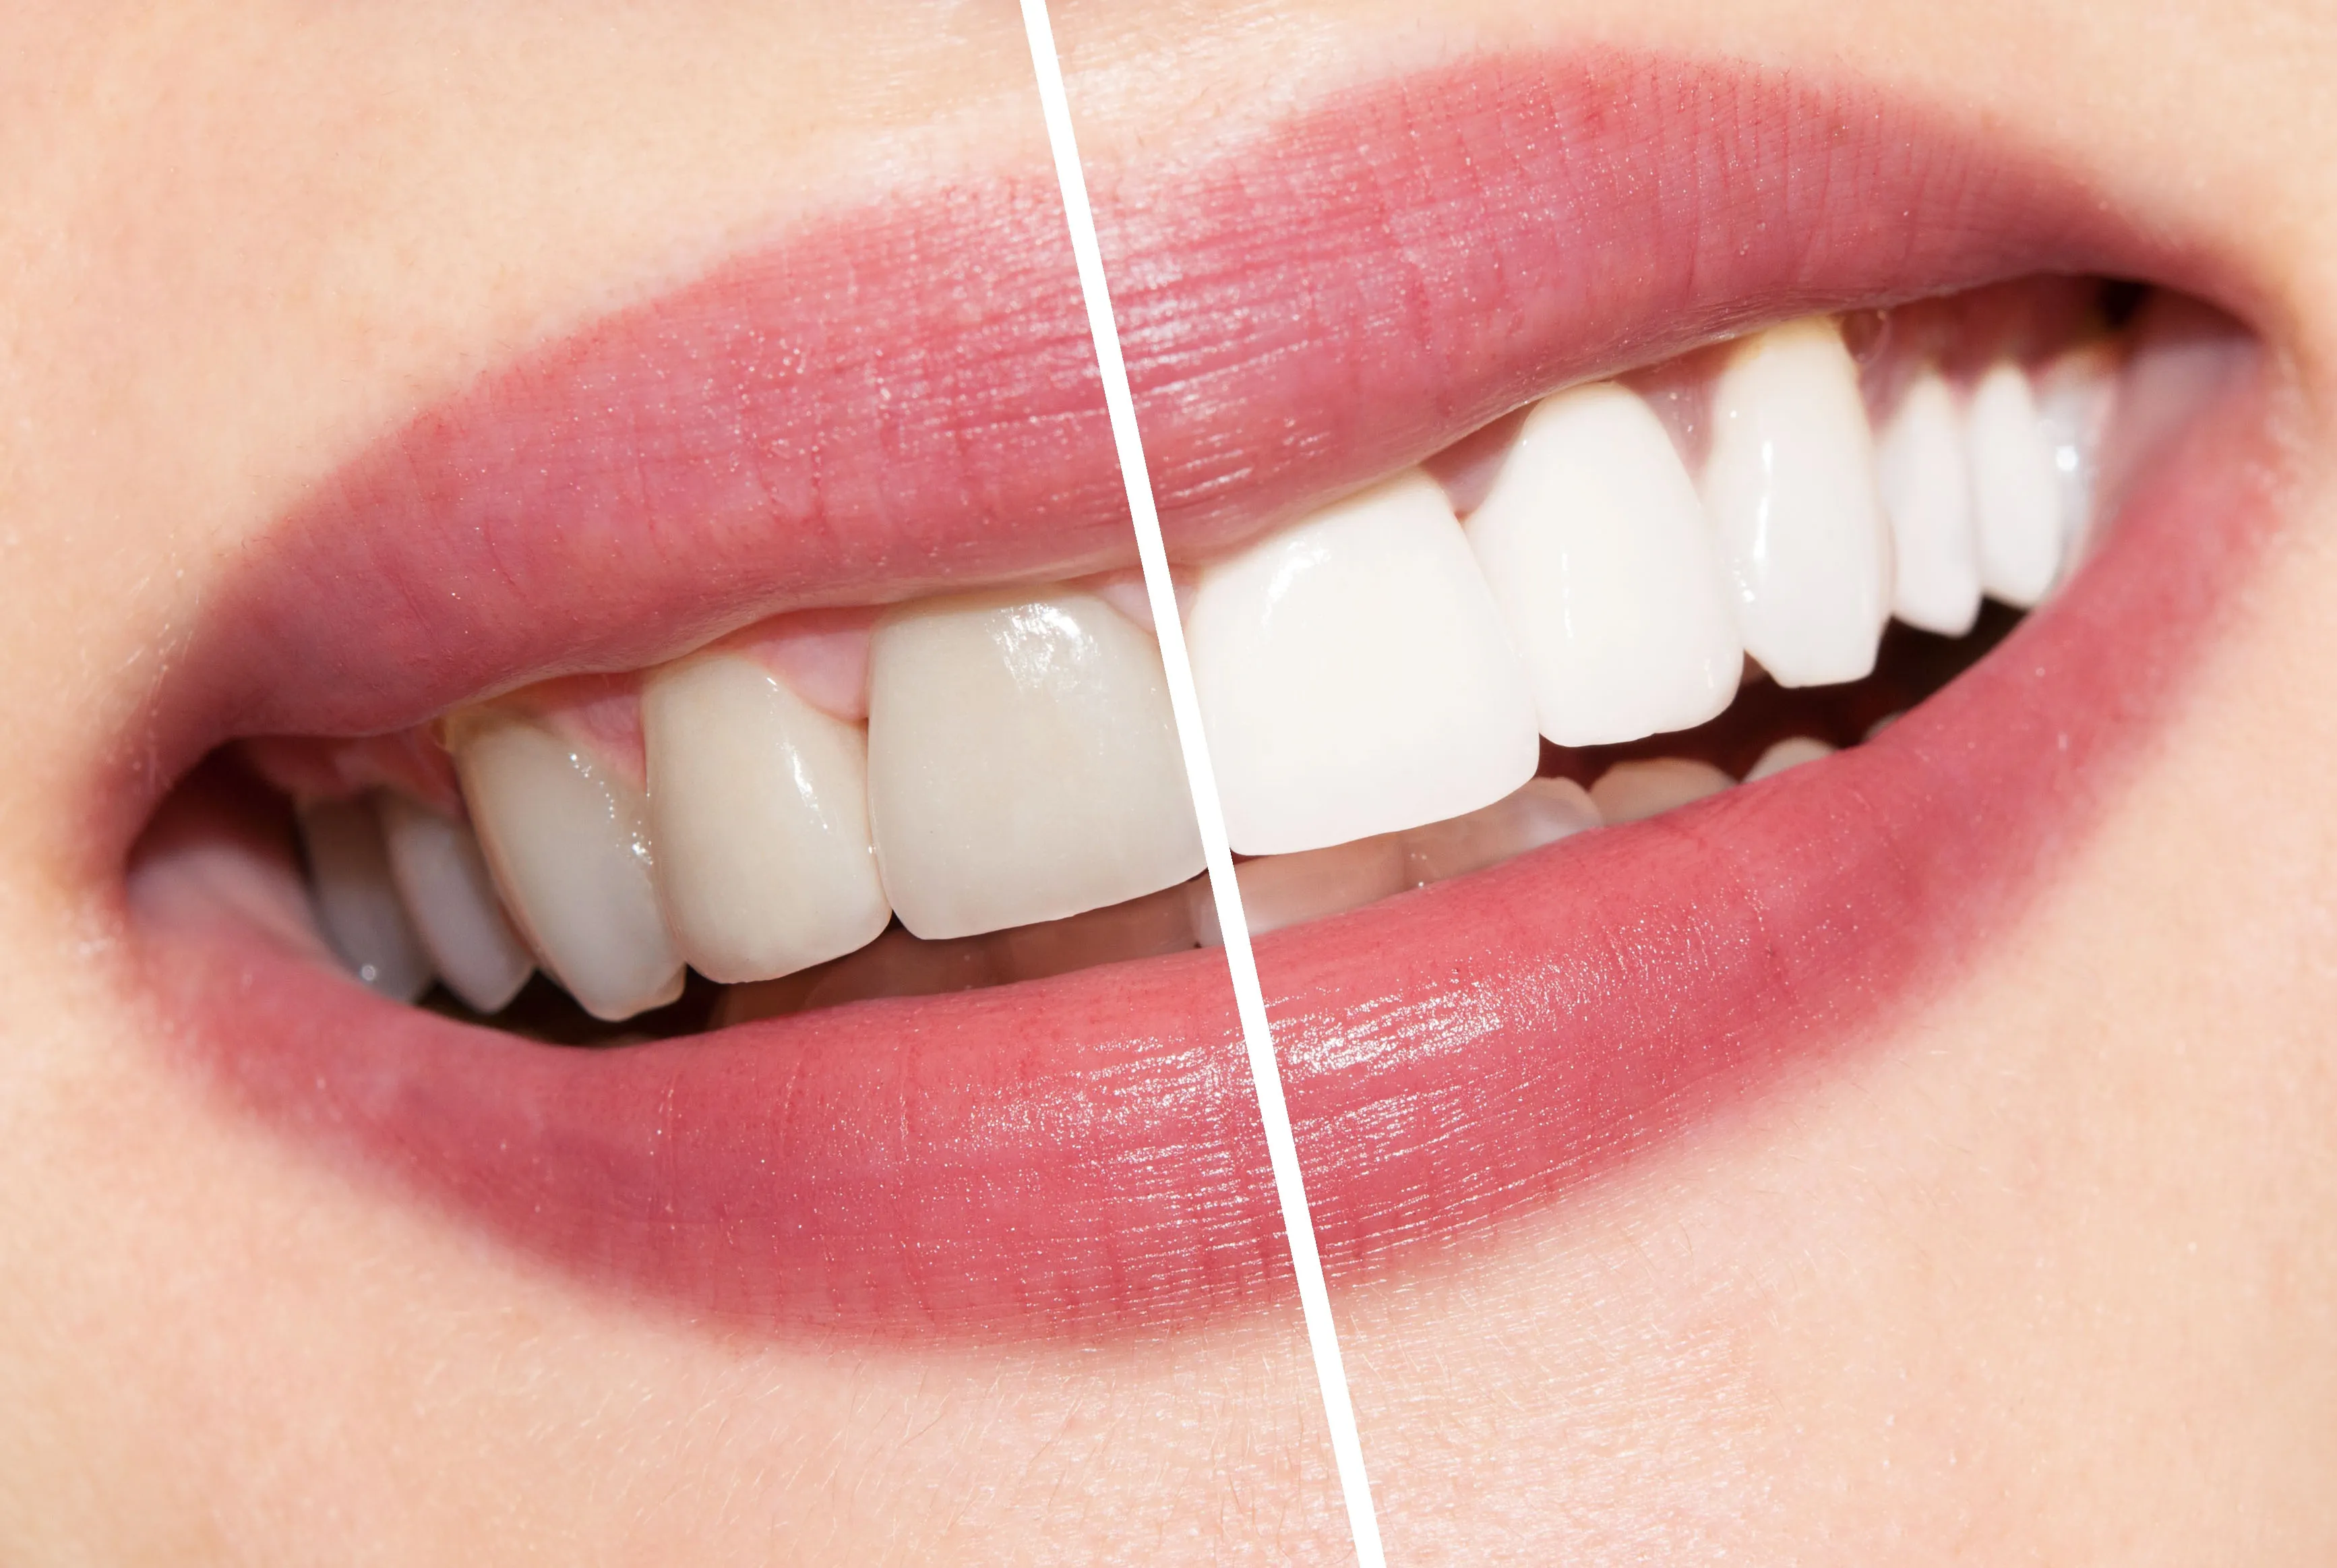
Secret 2 Mastering Photo Editing
Photo editing is an indispensable tool in enhancing teeth appearance. With the right techniques, you can subtly or dramatically brighten teeth and correct any color imperfections. Many software options are available, from professional-grade programs like Adobe Photoshop and Lightroom to user-friendly apps for mobile devices. The ability to edit allows you to correct issues in post-production, ensuring that the final image reflects your artistic vision. Mastering editing tools is key to achieving consistently impressive results in teeth whitening for photos.
Teeth Whitening Tools in Editing Software
Modern photo editing software offers a range of tools designed specifically for teeth whitening. These tools typically include adjustment brushes, sliders for brightness, contrast, and saturation, and sometimes even dedicated teeth whitening features. Using these tools allows you to isolate the teeth and make precise adjustments without affecting the rest of the image. The clone stamp or healing brush can be used to eliminate any unwanted spots or blemishes. Learning how to use these specialized tools effectively will give you the power to transform your photos with ease and precision.
Adjusting Brightness and Contrast

Beyond dedicated teeth whitening tools, adjusting brightness and contrast is crucial. Increasing brightness slightly can make teeth appear whiter, while adjusting contrast can add depth and definition. Be cautious not to overdo it, as excessive adjustments can lead to an unnatural appearance. The goal is to achieve a subtle enhancement that looks natural. Fine-tuning these settings to complement the overall tone of the image is vital. Experiment with small adjustments until you achieve a balanced and visually pleasing result. The right balance between brightness and contrast can dramatically improve the appearance of teeth in your photos.
Secret 3 Pre-Photo Whitening Treatments
While lighting and editing are important, the foundation for great photos of teeth starts before the camera even comes out. Pre-photo whitening treatments can significantly improve the natural whiteness of teeth, making the post-processing much easier and more effective. There are several options available, each with its own advantages and considerations. Investing in pre-photo treatments can yield significant benefits, leading to more natural-looking results and reducing the time spent on editing.
Professional Teeth Whitening Options
Professional teeth whitening performed by a dentist is the most effective way to achieve dramatic and long-lasting results. These treatments often involve the use of high-concentration bleaching agents activated by special lights. The advantage of professional whitening is the ability to achieve a significantly whiter smile in a single session, providing instant results. The process is supervised by a dental professional, which ensures both safety and efficacy. This is an excellent option if you need a quick transformation for a special event or a photo shoot.
Over-the-Counter Whitening Products

For those seeking a more accessible option, over-the-counter whitening products offer a convenient solution. These products include whitening strips, toothpastes, and gels. While they may not produce the same dramatic results as professional treatments, they can still provide a noticeable improvement over time. It is important to follow the instructions carefully to ensure effectiveness and avoid potential side effects like tooth sensitivity. Regular use of these products can help maintain a brighter smile, making them a useful addition to your pre-photo routine. Make sure to check the ingredients of the product.
Secret 4 Achieving the Perfect Smile
Beyond the technical aspects of lighting and editing, the subject’s smile itself plays a vital role. The way a person poses and the expression on their face can significantly impact the final image. Coaching your subject on how to pose and how to showcase their smile is often the difference between a good photo and a great one. A natural and confident smile will always look better, and enhancing that can make all the difference in teeth whitening for photos.
Pose and Expression Tips
Encourage your subject to relax and feel confident. A forced smile often looks unnatural. Tips include asking the subject to slightly part their lips, showing a hint of teeth, rather than a full, exaggerated grin. The eyes, not just the mouth, contribute to a genuine smile. Ask the subject to think of something that makes them happy, encouraging genuine emotion. Subtle adjustments can make a world of difference. Encourage the subject to practice in front of a mirror. Remind them that a slight upturn of the lips often looks best in photographs. The goal is to capture a smile that feels authentic and reflects the subject’s personality.
The Power of a Genuine Smile

A genuine smile is far more appealing than a posed one. It conveys warmth, happiness, and approachability. Capturing that authenticity can truly make your photos stand out. A genuine smile activates the muscles in the face, creating a natural lift that enhances the appearance of the teeth. To achieve this, build rapport with your subject. Create a relaxed environment where they feel comfortable expressing themselves. Engage in light conversation or tell a joke to encourage a spontaneous reaction. The best smiles often come naturally, so strive to capture moments of genuine joy and laughter. A sincere smile is the most powerful tool you have.
Secret 5 The Role of Diet and Lifestyle
The foods and drinks we consume and our daily habits significantly affect the appearance of our teeth. Certain items can stain teeth and dull their brightness. Adopting a lifestyle that supports oral health is critical for maintaining a white and healthy smile, making the photographic process simpler. By understanding how diet and lifestyle impact teeth, you can make informed choices that will contribute to brighter and more attractive photos. This is about long-term oral health and enhancing the effectiveness of your photographic efforts.
Foods and Drinks to Avoid
Certain foods and drinks are notorious for staining teeth. Coffee, tea, red wine, and dark-colored berries are some of the most common culprits. Reducing consumption of these items or drinking them with a straw can help minimize staining. Tobacco products are also significant contributors to tooth discoloration. If you’re aiming for bright teeth for photos, consider limiting these items in the days leading up to a shoot. Being mindful of what you consume can make a significant difference in the natural brightness of your teeth, reducing the need for extensive editing and making your photos more visually appealing.
Maintaining Oral Hygiene

Good oral hygiene is the foundation of a healthy, bright smile. Brushing your teeth at least twice a day, flossing daily, and using mouthwash can remove plaque and prevent stains from forming. Regular dental checkups and cleanings are also essential. Professional cleanings remove any buildup that can dull teeth, giving you a fresh, clean start. A consistent oral hygiene routine keeps teeth healthy and contributes to a brighter smile. By prioritizing oral hygiene, you’re not only supporting your health but also making it easier to achieve stunning results in your photographs, reducing the need for excessive editing, which leads to more natural and appealing photos.
Conclusion
Teeth whitening for photos is an art that combines technical skill with an understanding of aesthetics and lifestyle. By mastering these five secrets lighting techniques, editing tools, pre-photo treatments, posing and expression, and diet and lifestyle you can significantly enhance the appearance of teeth in your photographs. Remember that the goal is to create images that are visually appealing and reflect the subject’s best features, all while maintaining a natural and authentic look. With practice and a keen eye, you’ll be able to capture beautiful photos with bright, radiant smiles.