What You Need to Make Teeth Whitening Gel at Home
Creating your own teeth whitening gel at home can be a cost-effective way to brighten your smile. Before you start, it’s essential to gather all the necessary ingredients and supplies. This ensures a smooth process and helps you achieve the desired results without any hiccups. You’ll need a few key components, including a whitening agent, a thickening agent, and possibly a flavoring agent to make the process more pleasant. Also, it’s essential to have a precise way to measure the ingredients. Having these materials ready will help you make your teeth whitening gel.
Hydrogen Peroxide The Powerhouse of Whitening
Hydrogen peroxide is often the star ingredient in teeth whitening gels. It acts as an oxidizing agent, breaking down stains and discoloration on your teeth. The concentration of hydrogen peroxide plays a vital role in its effectiveness. Over-the-counter products typically use lower concentrations, while professional treatments may use higher levels. The concentration level you choose should be based on your teeth’s sensitivity and the degree of whitening you desire. For at-home use, a lower concentration is generally recommended to reduce the risk of gum irritation or sensitivity. This also helps you to ensure the safety of your teeth.
The Role of Glycerin in Your DIY Gel

Glycerin plays a crucial role in homemade teeth whitening gel. It acts as a humectant, which means it helps to retain moisture and prevents the gel from drying out too quickly. This is important because it ensures the gel can effectively adhere to your teeth for the required time. Glycerin also contributes to the gel’s texture, giving it the right consistency for easy application. Furthermore, it’s often considered a safe ingredient, making it suitable for use in oral products. Therefore, glycerin is an essential component of your teeth whitening gel, ensuring effectiveness and ease of use. This also prevents your teeth from becoming dry and sensitive.
Carbamide Peroxide for Whitening Gel
Carbamide peroxide is a popular alternative to hydrogen peroxide in teeth whitening gels. It is a compound that breaks down into hydrogen peroxide and urea when it comes into contact with water. This slow-release mechanism is beneficial, as it allows for a more gradual whitening process, potentially reducing sensitivity. Carbamide peroxide is available in various concentrations, and like hydrogen peroxide, the right concentration depends on the user’s needs and dental sensitivity. Many at-home whitening kits use carbamide peroxide because it is effective and gentler on the gums and teeth. It provides similar whitening results with potentially fewer side effects compared to hydrogen peroxide, making it a favorable choice for many.
Essential Ingredients You May Need
Apart from the main whitening agents, you might need some other ingredients. These may include a flavoring agent to make the gel taste better. You can use a small amount of food-grade flavorings, such as mint or other fruit flavors. A thickening agent, like vegetable glycerin, helps create the right consistency. Remember to have the correct measuring tools. Proper measurements are essential for effectiveness and safety, as the wrong ratios can cause irritation. Be cautious when selecting and combining ingredients, and always prioritize safety. This will help to get the desired results without harming your oral health.
Step-by-Step Guide to Making Whitening Gel

Start by gathering all your ingredients and equipment. Put on your gloves and eye protection. Measure the main whitening agent (hydrogen peroxide or carbamide peroxide) carefully, following the recommended concentration for your teeth’s sensitivity. Then, add the glycerin. Next, add a small amount of flavoring, if desired, to improve the taste. Gently mix all the ingredients together until you achieve a smooth, consistent gel. Avoid over-mixing to maintain the gel’s effectiveness. Once you’ve prepared the gel, transfer it to a clean, airtight container to preserve its potency. Your DIY teeth whitening gel is now ready for use. Always follow the safety guidelines during the entire process.
Mixing the Ingredients Correctly
Precise mixing is essential for a successful DIY teeth whitening gel. First, measure each ingredient carefully using the correct tools. Combine the ingredients in a non-metallic bowl. Mix the ingredients gently and consistently, avoiding any harsh stirring. The goal is to create a smooth, homogenous gel. Be careful not to over-mix, as this could reduce the effectiveness of the whitening agent. After mixing, inspect the gel for any lumps or inconsistencies. It is important to achieve the correct consistency for the product to be effective and safe. Check that all ingredients are well-combined to ensure the whitening process works efficiently.
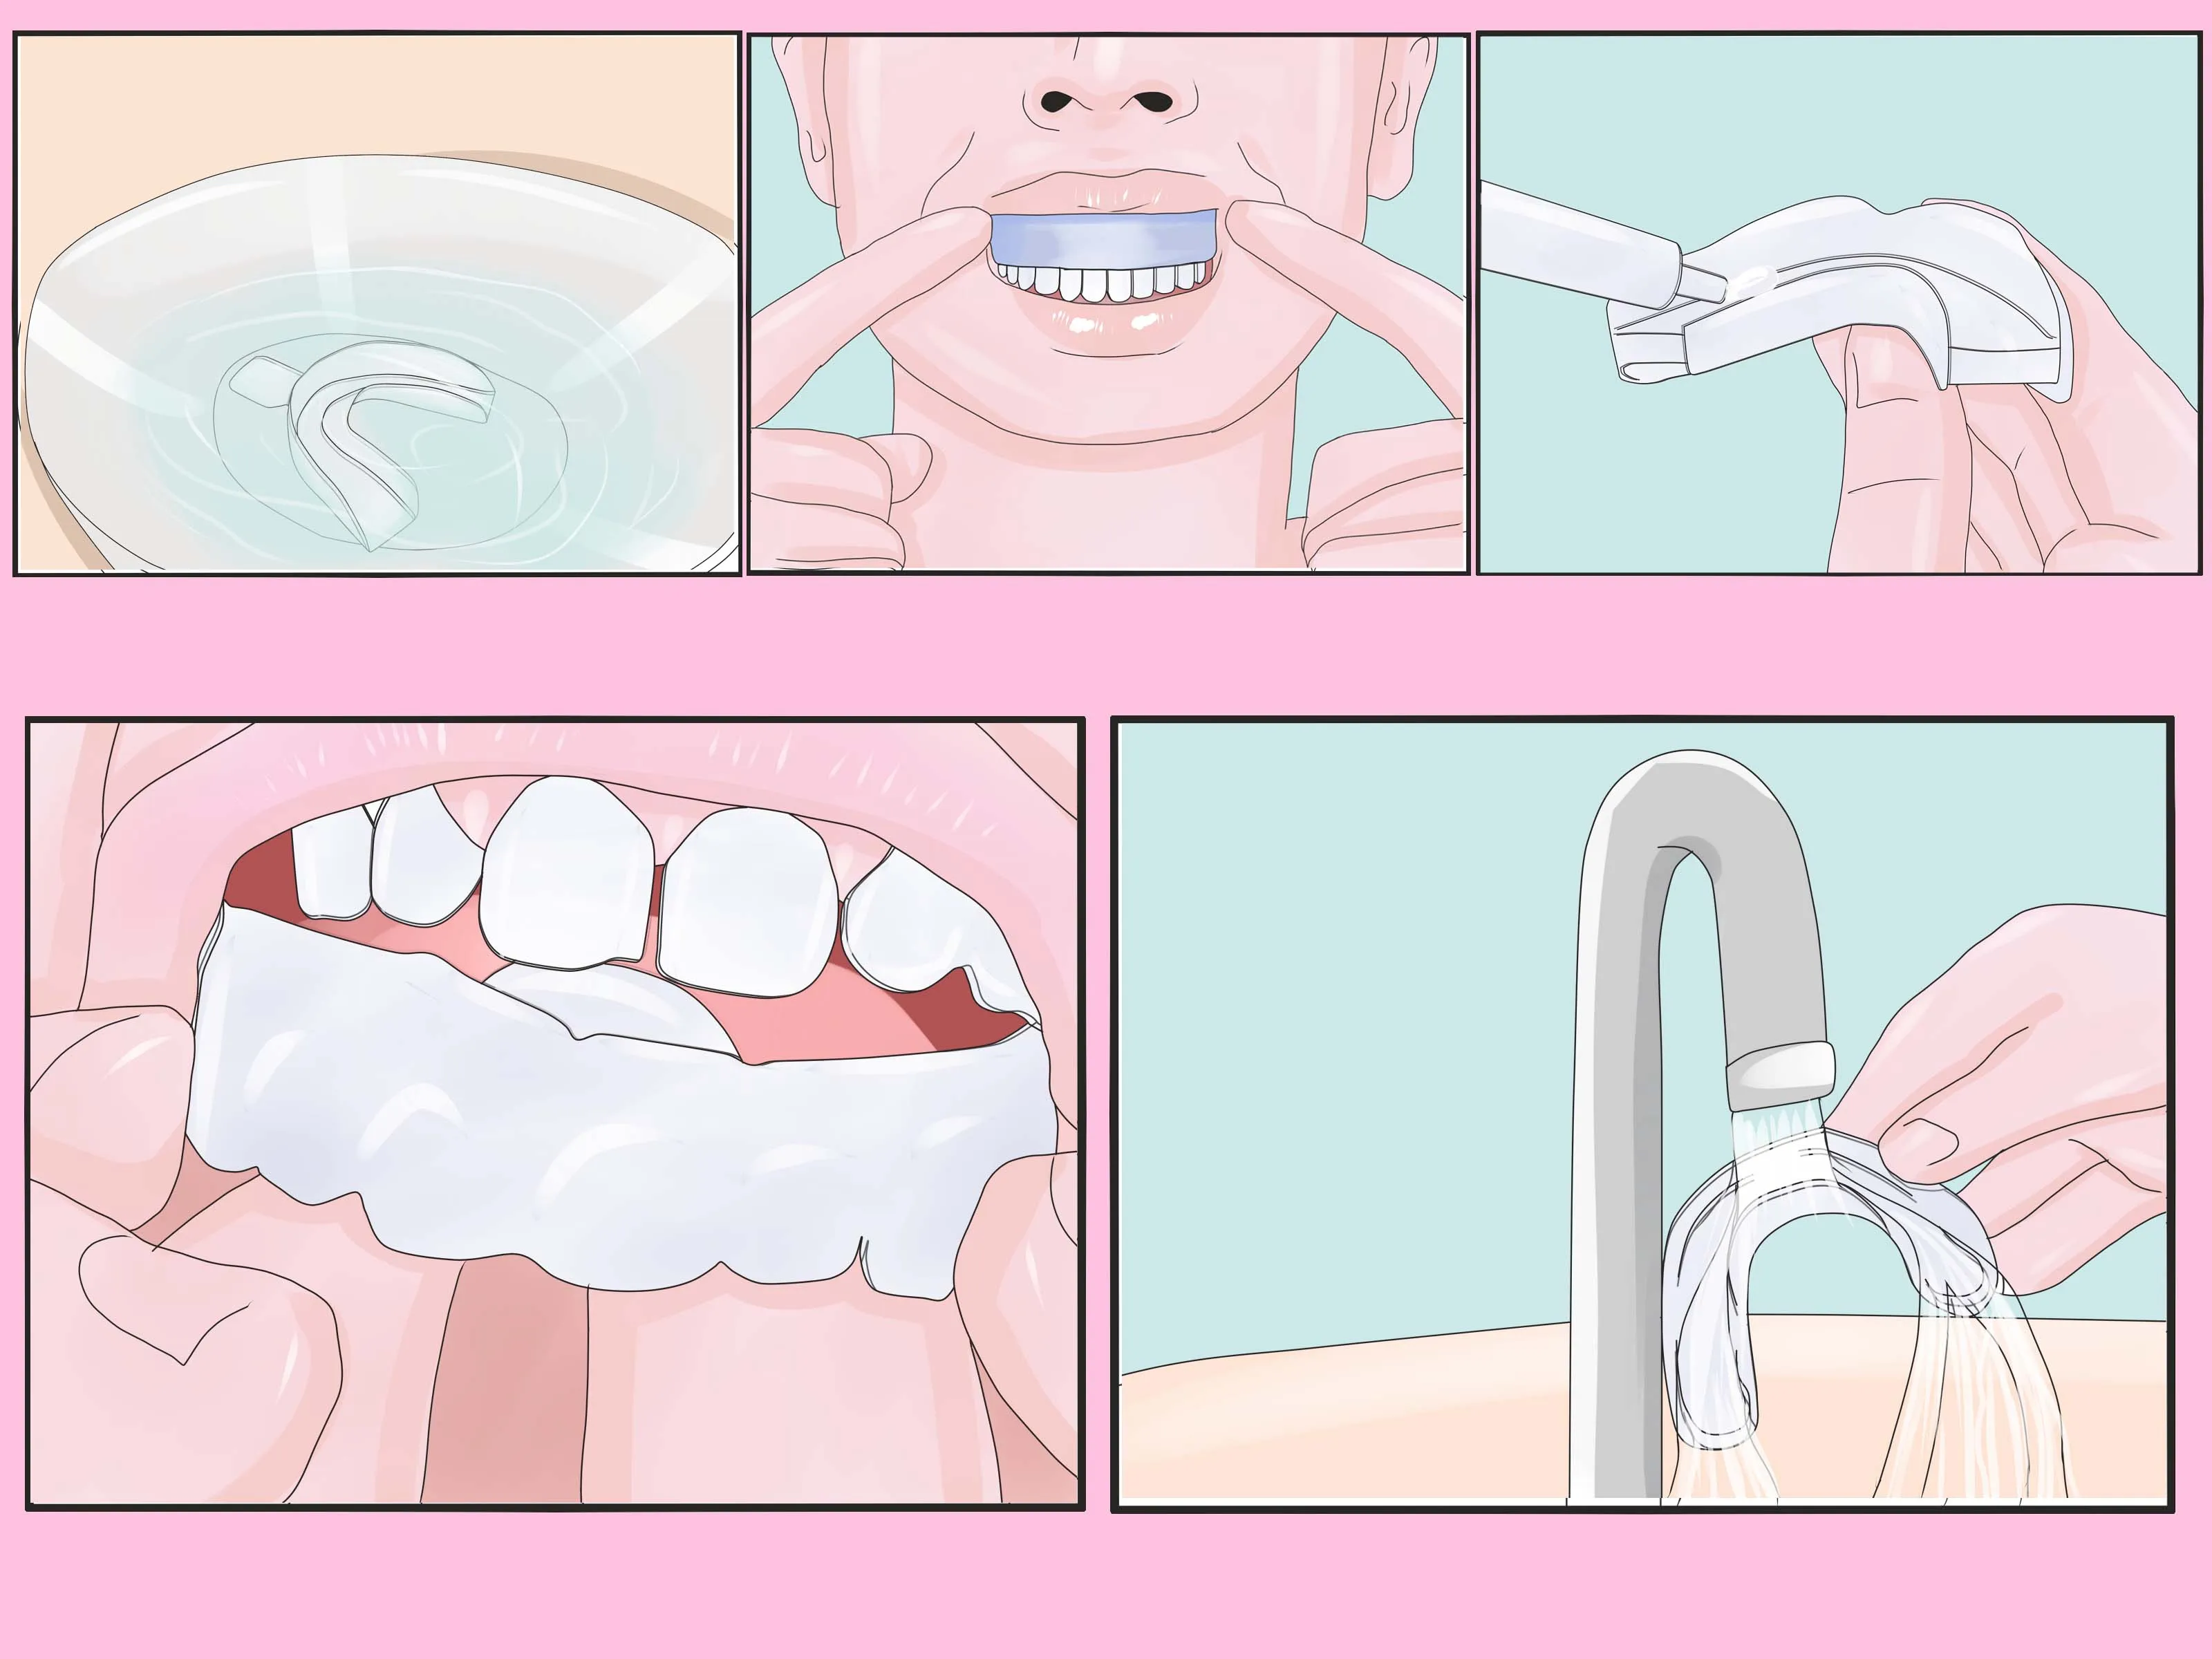
Application Methods for Optimal Results
There are several methods for applying your homemade teeth whitening gel. One common method is using a custom-fitted tray. If you have a tray, apply a small amount of gel to the tray, making sure the gel covers the surface of your teeth. Ensure the gel does not overflow to avoid gum irritation. Another method is applying the gel directly to your teeth using a cotton swab or a specialized brush. After application, wear the tray for the time recommended in your instructions, usually between 15 to 30 minutes. After this time, remove the tray or brush, rinse your mouth thoroughly with water, and avoid swallowing the gel. Remember to always follow the safety instructions and avoid excessive use.
Using Trays for Better Coverage

Teeth whitening trays enhance the effectiveness of your gel by ensuring even coverage. Trays are designed to fit snugly over your teeth, preventing the gel from leaking and ensuring that all surfaces are in contact with the whitening agent. Custom trays, made by your dentist, offer the best fit. However, you can also use over-the-counter trays. Apply a small amount of gel into the tray, distributing it evenly along the inside surface. Insert the tray into your mouth, pressing gently to ensure it fits properly. The tray holds the gel in place, preventing it from being diluted by saliva and ensuring maximum contact time. Using trays helps achieve more consistent whitening results.
Brushing Techniques for Whitening
You can also use the gel with brushing techniques, but use caution. After applying the gel to your toothbrush, gently brush your teeth, focusing on the front surfaces where stains are most visible. Use circular motions and avoid pressing too hard to prevent gum irritation. Brush for about two minutes, then rinse your mouth thoroughly with water. This method can be effective, but it may not provide even coverage compared to using trays. Avoid vigorous brushing, as this can damage your enamel. Following each application, make sure to brush again with regular toothpaste. This helps remove any residual gel and ensures your teeth are clean.
Post-Application Tips for Your Teeth
After using the teeth whitening gel, it’s essential to take good care of your teeth. Rinse your mouth thoroughly with water to remove any remaining gel. It is recommended to avoid eating or drinking anything for at least 30 minutes after treatment to allow the whitening process to continue without interruption. For the next few days, it is best to avoid foods and drinks that can stain your teeth, such as coffee, tea, red wine, and berries. Consider using a toothpaste designed for sensitive teeth to minimize potential discomfort. Regular dental check-ups will help ensure that your teeth remain healthy and beautiful. These steps will enhance the effectiveness of your teeth whitening efforts.
Understanding Potential Risks and Side Effects

While teeth whitening gels can be effective, it’s important to be aware of potential risks. The most common side effect is temporary tooth sensitivity. Some individuals experience mild gum irritation or inflammation. Overuse of whitening products can also lead to enamel erosion, making your teeth more susceptible to cavities and damage. If you experience any severe discomfort, discontinue use immediately and consult your dentist. The risks of at-home whitening are increased if you do not follow the instructions properly. Be aware of any existing dental conditions that might make whitening unsuitable for you. Therefore, always proceed with caution, and prioritize your oral health.
Common Side Effects
Several side effects are associated with the use of teeth whitening gels. Tooth sensitivity is a prevalent issue, usually occurring during or shortly after treatment. You may experience a sharp, temporary pain when consuming hot or cold food or drinks. Gum irritation is another common side effect. You might notice redness, swelling, or discomfort along the gum line. In rare cases, some users report a sore throat or a feeling of dryness in their mouth. These side effects are often temporary and subside shortly after you stop using the gel. However, if they persist or become severe, consult with your dentist. Be informed about these potential issues and take appropriate measures to minimize discomfort.
When to Consult a Professional
While DIY teeth whitening can be a good option, knowing when to seek professional help is crucial. If you experience severe sensitivity, gum irritation, or any other adverse reactions that persist, consult your dentist immediately. Your dentist can assess the situation and recommend appropriate treatments. Also, if you have existing dental issues like cavities, gum disease, or cracked teeth, it’s best to consult your dentist before starting. Professional treatments can provide more effective and safer results. Regular dental check-ups are also important to monitor your oral health. Your dentist can advise you on safe and effective whitening solutions.